
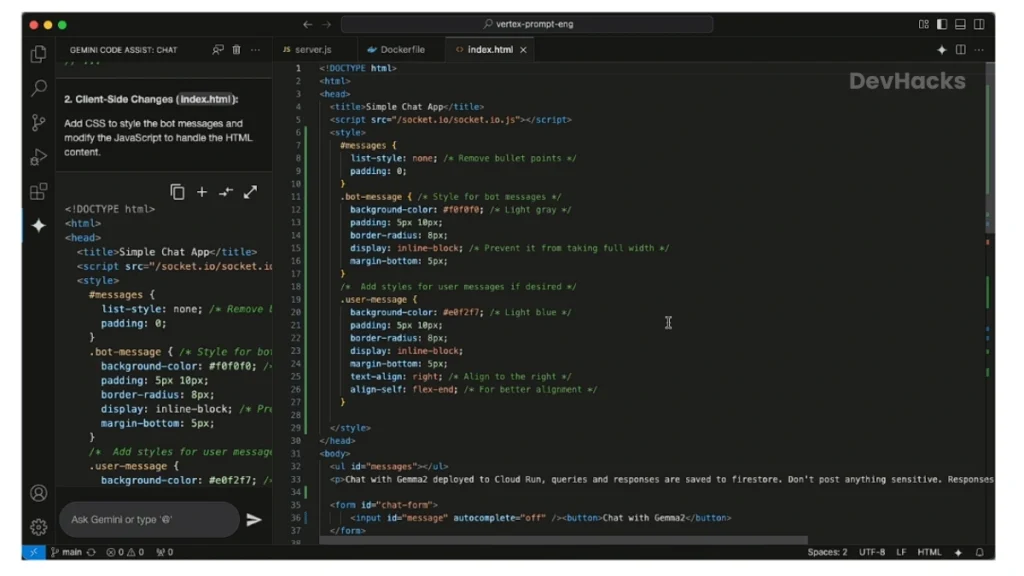
February 2026 में मैंने अपनी एक tool website build की थी जिसका नाम pintopindistance.in है। ये tool मैने claude AI की help से बनाया। मेरे पास कोई team नहीं है, और ना ही कोई designer है, और मेरे लिए पूरा दिन सिर्फ code लिखते रहना भी possible नहीं है। इस tool को बनाने के process में कुछ tools genuinely मेरे बहुत काम आए।
सबसे पहले मैने Google Stitch AI se UI Screen Design ki उसके बाद मैंने वो design copy किया और Claude AI में paste किया और prompt दिया ऐसी tool website बनाने का। और Claude AI से पूरा project build कर दिया।
उसके बाद मैंने Google AI Studio Try किया same Tool बनाने के लिए। और में shock हो गया था tool website देख के जो Google AI Studio ने बनाई थी। उसके बाद से मैने Google के और भी AI Tools देखना शुरू कर दिया और अपने workflow में use करना start कर दिया।
आज के इस article में वो 7 Google AI Tools for developers के बारे में बताऊंगा जो 2026 में actually relevant हैं। जो मैंने personally use किए हैं उनके बारे में अपना experience बताऊंगा, बाकी के बारे में research और honest breakdown दूंगा।
पहले यह समझो: Google AI Tools For Developers होते क्या हैं
एक developer का daily काम काफी fragmented होता है। एक तरफ code लिखना, दूसरी तरफ documentation पढ़नी, bugs ढूंढने, tests लिखने, और अगर full-stack developer हो तो UI भी खुदी handle करनी पड़ती है। इनमें से काफी काम repetitive और time-consuming है, जो आपकी creative को कम कर देते है।
Google AI developer tools वो software हैं जो इनमें से एक या ज़्यादा काम में AI की मदद से speed लाते हैं। कोई tool IDE में बैठकर code suggest करता है, कोई background में GitHub पर tests लिखता है, कोई plain English description से UI screen बना देता है, और कोई terminal में commands suggest करता है। Google ने 2025-26 में Gemini models की strength को इन सब जगह लगा दिया है। कुछ tools तो mature हैं, लेकिन कुछ अभी beta में हैं।
नीचे 7 tools की complete breakdown है।
1. Gemini Code Assist: IDE में Free AI Coding Assistant
Gemini Code Assist Google का AI coding assistant है जो सीधे आपके IDE में install होता है, चाहे VS Code हो, JetBrains हो, या Android Studio। यह GitHub Copilot की तरह काम करता है। जब आप कोई code लिखते हों तो ये Code लिखते वक्त अगली lines suggest करता है, पूरे functions generate करता है, और अगर code में कोई bugs हो तो उसे भी explain करता है। इसी के साथ ये unit tests bhi बनाता है।
March 2026 में Google ने इसे individual developers के लिए completely free कर दिया। इस से पहले यह सिर्फ Google Cloud subscribers के लिए था। मुझे यह एक genuinely ये एक अच्छा कदम लगा Google की तरफ से।
Free Plan में क्या मिलता है?
- प्रति महीना 180,000 code completions, यानी roughly 6,000 per day
- 240 chat interactions per day अपने code के बारे में सवाल पूछने के लिए।
- VS Code, JetBrains के सभी IDEs, और Android Studio में support
- Unit test generation
- Code explanation और debugging में मदद
- Source citations, यानी अगर suggestion किसी open source code से आई है तो वो बताता है
- Credit card की कोई ज़रूरत नहीं
Paid Plans
| Plan | Price | किसके लिए |
|---|---|---|
| Individual (Free) | ₹0 | Solo developers |
| Standard | लगभग ₹1,956/month | Small teams, ज़्यादा limits |
| Enterprise | लगभग ₹4,644/month | Large teams, private codebase indexing |
किस काम में genuinely help करता है?
Boilerplate code जो हर project में repeat होती है उसे लिखने में यह काफी time बचाता है। Unit tests generate करना जो अक्सर boring काम होता है वो इससे faster हो जाता है। किसी unfamiliar function को समझना हो या कोई simple bug explain करवाना हो, उसके लिए इसका chat interface अच्छा काम करता है।
Honest Limitations
Free tier में multi-file generation नहीं है, यानी अगर एक feature को कई files में साथ implement करना हो तो यह tool वो नहीं करेगा। Daily 240 chat sessions heavy coding sessions में जल्दी खत्म हो सकते हैं। Complex architectural decisions के लिए यह tool बना ही नहीं है, वो काम अभी भी आपको खुद करना पड़ेगा।
कब Use करें, कब नहीं
अगर आप Daily coding करते हो तो आप इसे हमेशा background में चालू रख सकते हो। Completions और quick questions के लिए यह solid है। लेकिन entire feature को scratch से design करना हो, या multi-file refactoring करनी हो, तो इसकी limitations आएंगी।
👉 Official site: codeassist.google
2. Google AI Studio: Gemini API को Use करने से पहले यहाँ Test करो
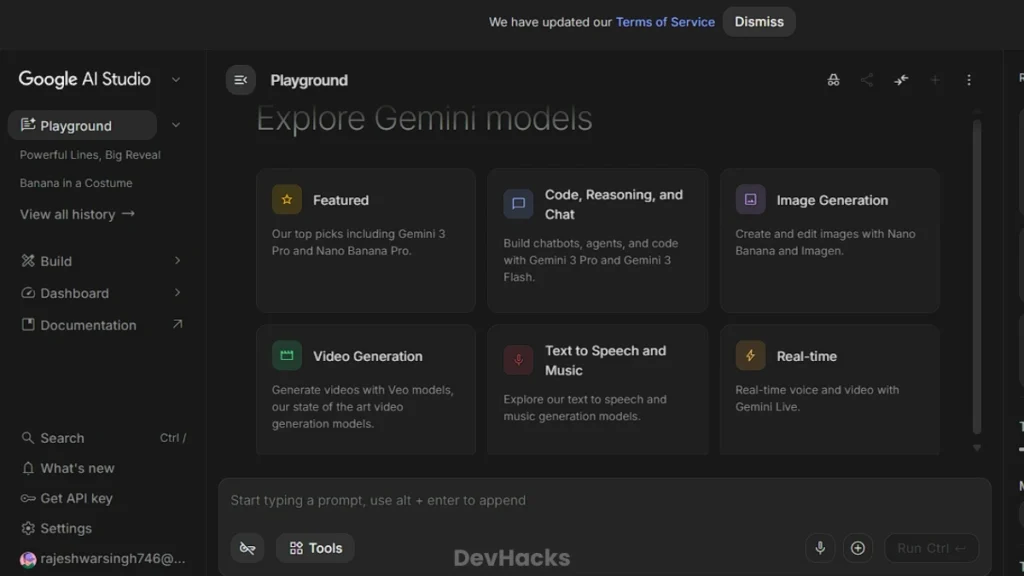
Google AI Studio एक browser-based tool है जहाँ आप बिना एक line code लिखे Gemini models को directly test कर सकते हो। यह कोई chatbot नहीं है। यह developers के लिए बना है जो Gemini API को किसी product में integrate करना चाहते हैं।
मैंने इसे personally use किया है और honestly कहूं तो यह Google का सबसे underrated developer tool है। pintopindistance.in बनाते वक्त जब भी Gemini API से कुछ integrate करना होता था, पहले AI Studio में test करता था। System prompt कैसा होगा, response quality कैसी है, token cost कितनी है, यह सब browser में confirm होने के बाद production में लगाता था। इस approach ने बहुत unnecessary debugging बचाई।
Features जो Developers के काम आते हैं
- Prompt testing: System prompts, user prompts, और context window को सीधे browser में test करो बिना कोई code लिखे।
- Token counter: आपका prompt कितने tokens consume करता है यह real-time में दिखता है, जिससे cost estimate करना आसान होता है।
- Model comparison: Gemini 3.1 Pro, Gemini 3.1 Flash, और दूसरे models के responses side-by-side compare कर सकते हो।
- Code generation: जो API call बनानी है उसके लिए Python, JavaScript, और दूसरी languages में ready-made code generate होता है जिसे directly copy करके project में लगा सकते हो।
- Vibe coding: March 2026 में यह feature आया जिसमें prompts से production-ready apps बन सकती हैं। Antigravity agent के साथ databases add करना, real-world services से connect करना, यह सब possible हो गया है।
- Completely free: Google AI Studio का use सभी regions में free है। Production में API calls pay-per-use होती हैं, लेकिन testing बिल्कुल free है।
एक Practical Example
मान लो आप एक app बना रहे हो जिसमें Gemini से user का text summarize होना है। AI Studio में पहले system prompt लिखो, test करो कि output कैसा आ रहा है, देखो कितने tokens जा रहे हैं, और cost calculate करो। यह सब confirm होने के बाद AI Studio ही आपके लिए Python या JavaScript में API call का code generate कर देगा जिसे directly project में paste करो। यह workflow बिना AI Studio के बहुत ज़्यादा trial and error वाली होती है।
कब Use करें
किसी भी Gemini API integration से पहले यहाँ ज़रूर आओ। Model testing, prompt iteration, cost estimation, और API code generate करने के लिए यह सबसे fast तरीका है।
👉 Official site: aistudio.google.com
3. Jules: Background में GitHub Tasks करने वाला Async Coding Agent
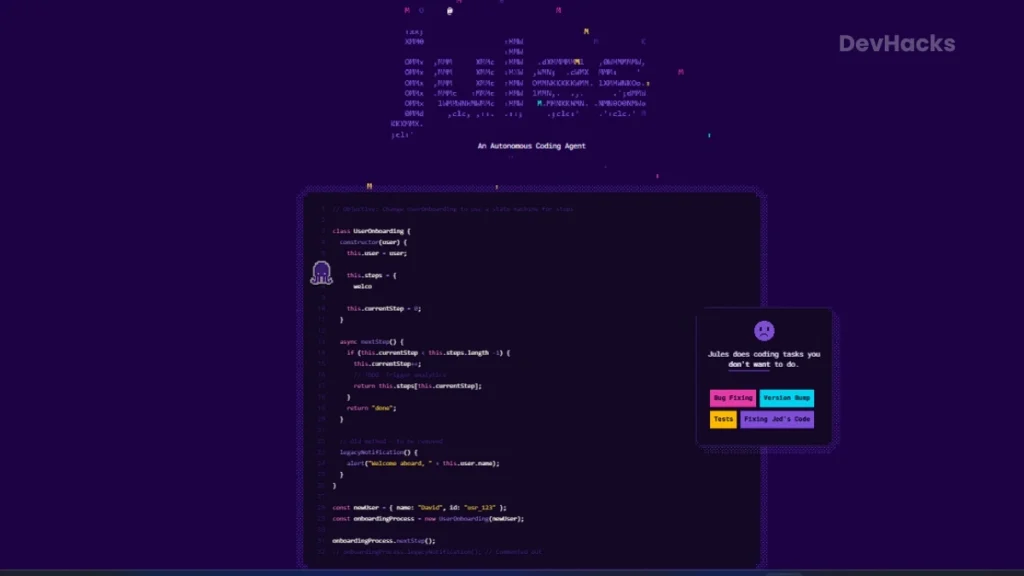
Jules इस list का सबसे अलग tool है। यह IDE plugin नहीं है, browser extension नहीं है। यह एक asynchronous coding agent है जो directly आपके GitHub repository से connect होता है और background में काम करता है।
इसका workflow बाकी सब tools से fundamentally अलग है। आप Jules को एक task assign करते हो जैसे “इस file में unit tests लिखो” या “इस dependency को latest version पर update करो”, और फिर laptop बंद करके जा सकते हो। Jules Google के cloud VM में background में काम करता है, और जब task पूरा होता है तो एक pull request ready करके GitHub पर रख देता है। आप बाद में आकर review करो, approve करो, और merge करो।
यह Cursor या Windsurf जैसा synchronous tool नहीं है जहाँ हर step आपके सामने होता है और आपको watch करना पड़ता है।
Features
- GitHub integration: Existing GitHub repos से directly connect होता है, कोई special environment setup नहीं करना पड़ता।
- Plan visibility: Jules काम शुरू करने से पहले आपको बताता है कि वो exactly क्या-क्या करेगा। आप approve करो तब काम शुरू होता है, blindly नहीं।
- Cloud VM execution: Task आपकी machine पर नहीं, Google के secure cloud VM पर run होता है।
- Parallel tasks: Multiple tasks एक साथ run हो सकते हैं।
- Audio changelog: Recent commits का audio summary generate करता है जो एक interesting feature है।
- Jules Tools CLI: Terminal से Jules को control करने के लिए command-line interface।
- Multimodal support: Images और visual outputs भी handle होते हैं।
Pricing
| Plan | Price | Daily Tasks | Concurrent Tasks |
|---|---|---|---|
| Free | ₹0 | 15 | 3 |
| Developer | Paid | 100 | 15 |
| Scale | Higher | 300 | 60 |
Jules किसके लिए Best है?
Repetitive और boring development tasks के लिए Jules genuinely useful है। Unit test writing, dependency version bumps, code comments add करना, documentation लिखना, छोटी bugs fix करना जहाँ logic clear हो, यह सब Jules को दो। इन कामों में Jules का async model सबसे ज़्यादा फायदेमंद है क्योंकि आप इन्हें assign करके खुद किसी ज़्यादा important काम पर focus कर सकते हो।
Honest Limitations
Free tier में सिर्फ 15 daily tasks हैं जो seriously use करने पर कम पड़ते हैं। Large codebases में context window का limitation आ सकता है। Complex architectural decisions या entirely new feature design के लिए Jules तैयार नहीं है अभी।
कब Use करें, कब नहीं
Boring, repetitive tasks के लिए Jules को assign करो और खुद किसी creative या complex काम पर लगो। लेकिन system design, complex new features, या production-critical logic के लिए Jules पर depend मत करो।
👉 Official site: jules.google
4. Gemini CLI: Terminal में Direct AI Access
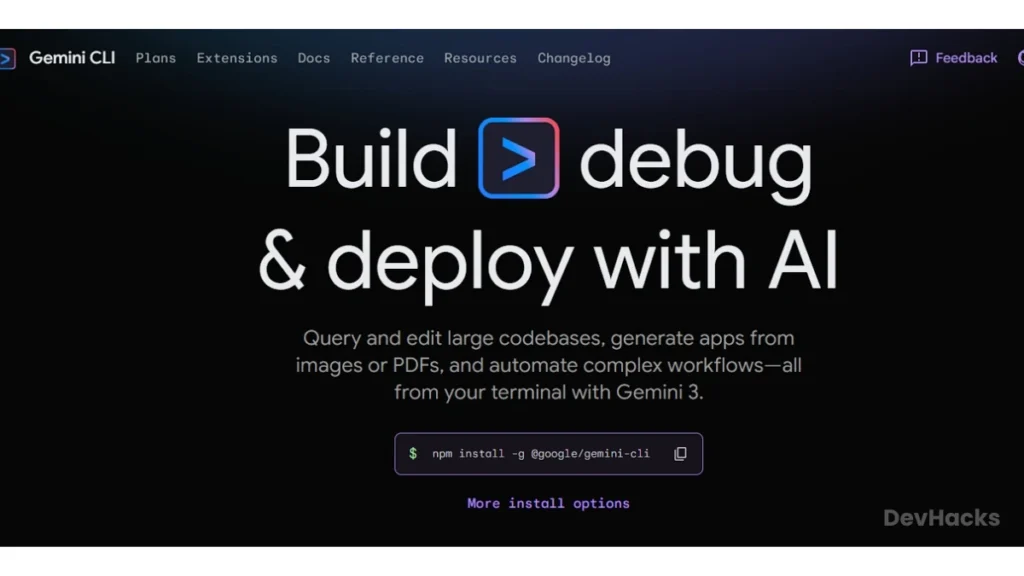
Gemini CLI एक open source command-line tool है जो Gemini models को directly terminal में लाता है। कोई IDE ज़रूरी नहीं, कोई browser नहीं, बस terminal open करो और Gemini से directly काम करो।
यह उन developers के लिए है जो IDE से ज़्यादा terminal में रहते हैं जैसे backend engineers, DevOps engineers, और system administrators।
क्या-क्या कर सकते हो?
किसी file का code terminal में explain करवा सकते हो। Shell script में कोई error आई है तो उसे analyze करवा सकते हो। किसी API endpoint को curl से test करने का exact command बनवा सकते हो। Log files में patterns identify करवा सकते हो। किसी unfamiliar command का syntax ढूंढना हो तो terminal छोड़े बिना पूछ सकते हो।
Jules Tools के साथ integration भी है जिसमें Gemini CLI से analysis करके Jules को task assign करना possible है।
Setup
bash
npm install -g @google/generative-ai-cliGoogle AI Studio में जाकर API key generate करो जो free है, फिर उसे terminal में environment variable के रूप में set करो।
कब Use करें
Terminal-heavy workflows में, DevOps tasks में, और quick command या syntax lookup के लिए यह tool genuinely time बचाता है। अगर आप mostly IDE में काम करते हो और terminal कम use करते हो तो Gemini Code Assist ही काफी है।
5. Google Stitch AI: Plain English से UI Design और Frontend Code
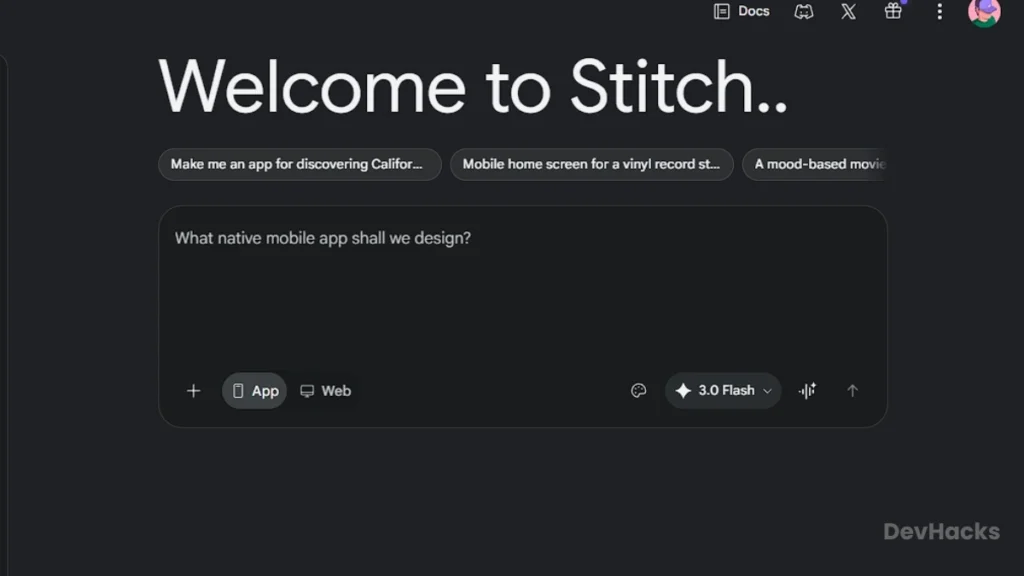
Google Stitch AI वो tool है जिसने मुझे genuinely surprise किया। pintopindistance.in tool website बनाते वक्त मुझे UI screens का starting point चाहिए था लेकिन Figma में scratch से design करना बहुत time-consuming था। इसलिए मैने Google Stitch AI का use किया। Stitch AI में मैने plain English में describe किया कि screen कैसी चाहिए, और इस Ai tool ने एक high-fidelity UI design generate करके मुझे दिया। इसके डिजाइन्स को आप HTML, CSS, और React code किसी में भी export करके use कर सकते हो।
अगर आपके पास Design skills नहीं हैं, या Figma ठीक से नहीं आता तो भी आप Stitch AI को Easily use कर सकते है।
March 2026 में इसका major update आया जिसने इसे एक basic experiment से एक full design platform में बदल दिया।
Google Stitch AI से Design कैसे बनाएं | Figma भूल जाओ, 1 Prompt में App UI Ready!
Features
- Text to UI: Plain English description से high-fidelity UI screens बनाना। जितनी specific description हो उतना better output।
- Voice Canvas: अब बोलकर भी design change कर सकते हो। “Dark mode add करो” या “Navigation को sticky बनाओ” कहो और Stitch real-time में update करता है।
- Vibe Design: Exact components specify नहीं करने पड़ते। Business objective या desired feeling describe करो जैसे “clean SaaS dashboard, professional feel, minimal colors” और Stitch multiple design directions explore करके देता है।
- Multi-screen generation: एक बार में 5 screens generate होती हैं। पूरा user flow एक साथ देख सकते हो।
- Sketch to UI: Whiteboard sketch या wireframe की photo upload करो, Stitch उसे digital UI में convert कर देता है।
- Figma export: Design सीधे Figma में paste होती है layers और auto-layout के साथ।
- Code export: HTML, CSS, React code directly export होता है।
- DESIGN.md: यह feature developers के लिए particularly useful है। अपना design system एक markdown file में export करो, उसे GitHub repo में commit करो, और फिर Gemini Code Assist या Claude Code automatically उसी design को follow करेगा जब नए components बना रहे हो।
- MCP integration: Stitch को Antigravity, Gemini CLI, और Cursor से directly connect कर सकते हो।
Free Plan
Standard mode में 350 generations प्रति महीना मिलती हैं जो Gemini 3 Flash पर run होती हैं। Experimental mode में 50 generations मिलती हैं जो Gemini 3.1 Pro पर run होती हैं और better quality देती हैं। Credit card की ज़रूरत नहीं।
Limitations
Complex design systems अभी fully manage नहीं होते। Monthly quota heavy daily use में जल्दी खत्म हो सकता है। Generated code हमेशा production-ready नहीं होती, उसे customize और clean करना पड़ता है।
कब Use करें, कब नहीं
UI mockup, prototype, landing page, dashboard design जब scratch से बनानी हो तब Stitch time बचाता है। लेकिन highly customized brand-heavy enterprise design के लिए Figma में manually काम करना ज़्यादा control देता है।
👉 Official site: stitch.withgoogle.com
6. Google Antigravity: Agentic Development Platform
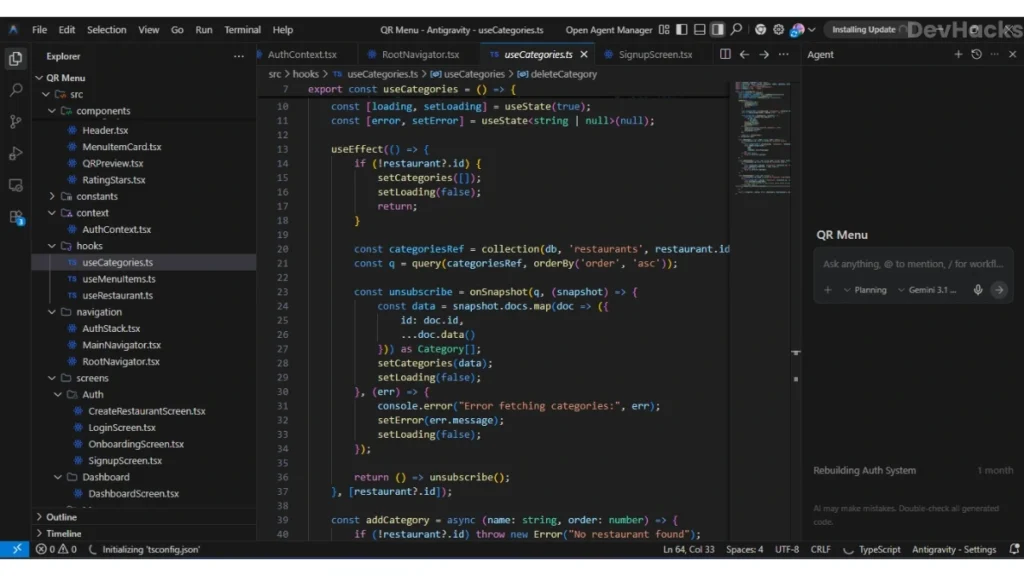
Google Antigravity इस list का सबसे ambitious और सबसे experimental tool है। यह सिर्फ IDE नहीं है। यह एक agentic development platform है जहाँ AI agents autonomously आपके editor, terminal, और browser में काम करते हैं।
इसे Cursor या VS Code का upgrade समझो लेकिन एक fundamental difference के साथ। यहाँ agents multi-step complex tasks खुद plan करते हैं, execute करते हैं, और verify करते हैं। आप इसे सिर्फ direction देते हो, और agent अपने आप काम करता है।
Google Antigravity को मैने खुद use किया है। मैने इसमें कुछ tool based apps bnaye the testing के लिए। मैने एक process follow किया था, सबसे पहले मैने chatgpt से अपने idea के related prompt generate करवाया, उसके बाद Stitch AI से UI design करवाया, aur वो design Antigravity में डालके उसे अपने idea के बारे में बताया। उसके बाद Antigravity ने खुद सब कुछ scratch से बनाना शुरू किया और एक functional React Native Mobile App बनके दे दी।
Features
- Editor View: Traditional IDE जैसा experience, tab completions और inline commands के साथ, जो आपको familiar workflow देता है।
- Agent Mode: Complex multi-step tasks agents को delegate करो जो पूरे project का context समझकर काम करते हैं।
- Artifacts: Agent हर major step पर tangible deliverables बनाता है जैसे task lists, implementation plans, screenshots। इन पर directly comment करके feedback दे सकते हो और agent बिना execution रोके उसे incorporate करता है।
- Multi-model support: Gemini 3 Pro के साथ Claude Sonnet और OpenAI models भी support होते हैं।
- Stitch integration: Stitch में design करो और directly Antigravity में export करो, design से code तक का pipeline बनता है।
- Cross-platform: MacOS, Windows, और Linux तीनों पर काम करता है।
- Free: Individuals के लिए free है।
Honest Assessment
Concept में यह genuinely powerful है। लेकिन अभी Cursor या Windsurf जितना mature और stable नहीं है। Inconsistent outputs आते हैं, कभी-कभी beta product की तरह behave करता है। अगर आप Cursor से switch करने की सोच रहे हो तो अभी wait करना better है। लेकिन अगर agentic development explore करना है और Google ecosystem में deeply integrated हो तो यह एक interesting experiment है।
Google Antigravity vs Claude AI: मैंने दोनों से एक Restaurant Website बनवाई, Result Shocking था
कब Use करें, कब नहीं
Agentic development explore करना हो तो ज़रूर try करो। लेकिन production-critical projects के लिए अभी mature tools जैसे Cursor या VS Code ज़्यादा reliable हैं।
👉 Official site: antigravity.google.com
7. NotebookLM: Documentation पढ़ने की Problem का Solution
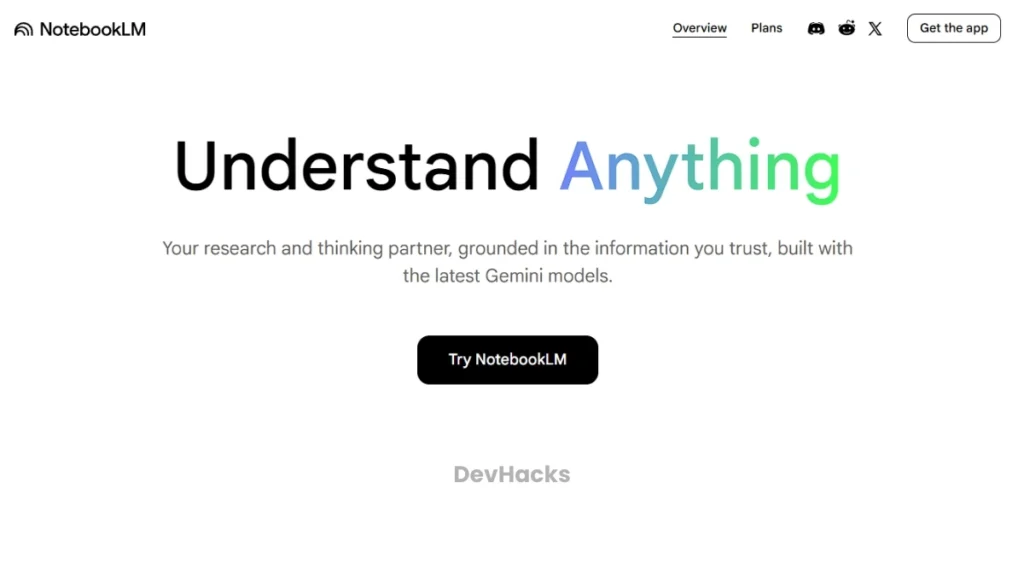
NotebookLM coding tool नहीं है। लेकिन developers के लिए इसे इस list में रखना ज़रूरी था क्योंकि यह एक real और common problem solve करता है।
हर developer की ज़िंदगी में बहुत documentation पढ़नी पड़ती है। Library docs, API references, technical papers, design specs। यह सब manually पढ़ना genuinely time-consuming है। NotebookLM में आप अपने documents upload करते हो और फिर उनसे directly questions पूछ सकते हो। यह internet search नहीं करता, सिर्फ आपके uploaded documents से answers देता है।
Features
Source-grounded answers: जो भी answer देगा वो आपके uploaded document से देगा। Internet से hallucinate नहीं करेगा।
Multiple formats support: PDFs, text files, YouTube video links, Google Docs, और audio files सब upload हो सकते हैं।
Audio Overview: Document का podcast-style audio summary generate होता है जिसे background में सुनते हुए concept समझ सकते हो।
Source citations: हर answer के साथ बताता है कि document में exactly कहाँ से यह information आई।
Free plan: Set usage limits के साथ free में available है।
Developers के लिए Actual Use Cases
किसी new library की documentation PDF upload करो और specific questions पूछो बजाय पूरी doc manually पढ़ने के। API reference docs को parse करने में use करो। किसी technical RFC या spec document को जल्दी understand करना हो तो यहाँ upload करो। किसी codebase की design doc upload करो और architecture से related questions पूछो।
मैंने personally इसे try किया है। एक library की 200-page PDF थी। NotebookLM में upload की और specific feature के बारे में questions पूछे। जो manually 2 घंटे लेता वो 20 मिनट में हो गया क्योंकि tool exact page reference देता है जहाँ answer है।
Limitations
Free plan में notebooks और sources की limit है। बहुत technical और code-heavy documentation में accuracy कम हो सकती है। Real-time web search नहीं होती, सिर्फ uploaded documents से काम होता है।
कब Use करें
New technology, library, या framework सीखते वक्त पहले documentation यहाँ डालो। Long documentation को quickly process करने का यह सबसे effective तरीका है।
👉 Official site: notebooklm.google.com
सातों Tools का Comparison Table
| Tool | काम क्या करता है | Free Plan | Paid (INR approx.) | Rating |
|---|---|---|---|---|
| Gemini Code Assist | IDE में code completion, chat, unit tests | ✅ 180K completions/month | ₹1,956/month (Standard) | ⭐⭐⭐⭐ |
| Google AI Studio | Gemini API testing, prompt iteration, vibe coding | ✅ Completely free | Pay-per-use API | ⭐⭐⭐⭐⭐ |
| Jules | GitHub async tasks, tests, bug fixing | ✅ 15 tasks/day | Paid tiers available | ⭐⭐⭐⭐ |
| Gemini CLI | Terminal AI agent, DevOps tasks | ✅ Generous limits | AI Pro se limits badhti hain | ⭐⭐⭐⭐ |
| Google Stitch | Text to UI, frontend code generation | ✅ 350 generations/month | लगभग ₹1,700/month Pro | ⭐⭐⭐⭐ |
| Google Antigravity | Agentic IDE, multi-step tasks | ✅ Free (Beta) | Enterprise plans | ⭐⭐⭐ |
| NotebookLM | Documentation AI, research reading | ✅ Free (limited) | Pro plan available | ⭐⭐⭐⭐ |
शुरुआत कैसे करें: 5-Step Roadmap
Step 1: Gemini Code Assist से शुरुआत करो
VS Code खोलो, Extensions tab में “Gemini Code Assist” search करो, install करो, और अपने Google account से login करो। Free tier automatically activate हो जाता है। अब अपना कोई existing project खोलो और थोड़ी देर code लिखो। Suggestions आनी शुरू हो जाएंगी। पहले दो-तीन दिन इसे observe करो कि किस काम में यह helpful है और किस काम में नहीं।
Step 2: Google AI Studio को Explore करो
aistudio.google.com पर Google account से login करो और एक simple prompt type करके Gemini का response देखो। Token count notice करो, model options देखो, और “Get Code” button try करो जो API call का ready-made code generate करता है। अगर आपके किसी project में Gemini API integrate करनी है तो production में लगाने से पहले हमेशा यहाँ test करो।
Step 3: Google Stitch में एक UI Try करो
stitch.withgoogle.com पर जाओ और किसी ऐसी screen का description type करो जो आपके किसी project के लिए relevant हो। जैसे “A developer dashboard with API usage metrics, recent logs, and account settings, dark theme, minimal design।” देखो क्या generate होता है, multiple variants compare करो, और HTML export करके locally open करो।
Step 4: Jules में एक Boring Task Assign करो
jules.google पर अपना GitHub account connect करो और किसी ऐसे repository को select करो जिसमें tests कम हैं या documentation missing है। Jules को एक specific task दो जैसे “Add unit tests for the utility functions in utils.js।” Jules का plan देखो, approve करो, और कुछ देर बाद pull request check करो।
Step 5: NotebookLM को Documentation Reading की आदत बनाओ
अगली बार जब कोई नई library या framework use करनी हो, उसकी official documentation PDF download करो और notebooklm.google.com में upload करो। फिर specific questions पूछो बजाय पूरी doc scroll करने के। यह एक छोटी सी habit change है लेकिन time genuinely बचाती है।
मेरा Real Workflow
pintopindistance.in बनाते वक्त मैंने Claude Code को primary tool की तरह use किया। Google के tools specific scenarios में आए।
Google AI Studio: जब भी Gemini API से कुछ integrate करना होता था, पहले AI Studio में test करता था। System prompt कैसा होगा, response quality कैसी है, token cost कितनी है, यह सब browser में confirm करके production में लगाता था। इससे बहुत unnecessary debugging बची।
Google Stitch: कुछ UI screens के लिए starting point चाहिए था। Stitch में describe किया, output आया, HTML export किया, और उसे customize किया। Exact design नहीं गई लेकिन blank page से शुरू करने से बहुत बेहतर था।
बाकी tools जैसे Jules, Gemini CLI, और Antigravity मैंने इस project के बाद experiment के तौर पर use किए हैं। Jules की async approach interesting है, Gemini CLI terminal workflows में genuinely useful है। Antigravity अभी explore कर रहा हूं।
Common Problems और उनके Solutions
Problem 1: Gemini Code Assist की daily 240 chat limit heavy sessions में जल्दी खत्म हो जाती है।
यह तब होता है जब chat को complex multi-step conversations के लिए use करते हो। Chat को simple, focused questions के लिए रखो। Complex API integration या detailed architecture discussion के लिए Google AI Studio में जाकर directly Gemini से बात करो जहाँ limits अलग हैं।
Problem 2: Jules का free tier सिर्फ 15 daily tasks देता है जो seriously use करने पर कम पड़ते हैं।
Jules को priority tasks दो जो boring हों और time लें जैसे test writing, dependency updates, documentation। Everyday coding खुद करो। Free tier को carefully allocate करो, हर task meaningful हो।
Problem 3: Google Stitch में generated UI production-ready नहीं लगती।
आप Stitch AI को starting point मानो, final output नहीं। आप UI बनाओ और उसे HTML/CSS export करो, code को clean करो, और customize करो। यह blank page से शुरू करने से बहुत better है। DESIGN.md export करो और उसे repo में commit करो ताकि coding agent design system follow करे।
Problem 4: Gemini CLI का API key setup confusing लगता है।
Google AI Studio में जाओ, left sidebar में “Get API Key” पर click करो, key generate करो। फिर terminal में यह command run करो जहाँ YOUR_KEY की जगह अपनी actual key लिखो।
bash
export GEMINI_API_KEY="YOUR_KEY"Problem 5: Google Antigravity में inconsistent और unexpected results आते हैं।
यह expected है क्योंकि Antigravity अभी beta में है। Artifacts को हर step पर review करो और blindly trust मत करो। Production projects के लिए Cursor या VS Code अभी ज़्यादा reliable हैं।
5 Tips जो Actually Useful हैं
पहली tip: Gemini Code Assist का हर suggestion accept करने से पहले पढ़ो। AI-generated code plausible लगती है लेकिन subtle bugs हो सकते हैं जो review के बिना catch नहीं होते।
दूसरी tip: Google AI Studio में production API call लगाने से पहले हमेशा test करो। यह एक ऐसी habit है जो लंबे समय में बहुत debugging बचाती है।
तीसरी tip: Jules को वो काम दो जो आप हमेशा postpone करते रहते हो जैसे tests लिखना, comments add करना, docs update करना। यही काम Jules सबसे अच्छे से करता है।
चौथी tip: Google Stitch का DESIGN.md feature ज़रूर use करो। Design export करके GitHub repo में commit करने से coding agent automatically उसी design को follow करता है जब नए components बनते हैं।
पाँचवीं tip: इन सातों tools को एक साथ install करके confuse मत हो। Gemini Code Assist पहले setup करो, एक-दो हफ्ते use करो, फिर अगला tool add करो।
3 Biggest Mistakes
⚠️ पहली mistake: AI-generated code को बिना review किए production में लगाना। Gemini Code Assist, Jules, Antigravity, इनमें से कोई भी tool 100% correct code guarantee नहीं देता। हर output को review और test करना ज़रूरी है।
⚠️ दूसरी mistake: Jules को complex feature development का काम देना। Jules boring repetitive tasks में strong है। Architecture decisions और complex new features के लिए Jules तैयार नहीं है और inconsistent output देगा।
⚠️ तीसरी mistake: Google Antigravity को production-critical projects के लिए primary tool मानना। यह अभी beta में है और Cursor या Windsurf जितना stable नहीं है।
Real Results: क्या Actually Change होता है
इन tools के consistent use से जो measurable improvements होती हैं वो यह हैं।
- Documentation पढ़ना जो पहले 1-2 घंटे लेता था वो NotebookLM के साथ 15-20 मिनट में होता है।
- Boilerplate setup जो पहले 20-25 मिनट लेती थी वो Gemini Code Assist के साथ 4-5 मिनट में होती है।
- Unit tests जो अक्सर postpone होती थीं वो Jules से assign होती हैं।
- UI का starting point जो पहले Figma में scratch से बनाने में घंटों लगते थे वो Stitch में 20-30 मिनट में मिलता है।
- API prototyping जो production code लिखने के बाद test होती थी वो अब AI Studio में पहले 10 मिनट में validate हो जाती है।
जो नहीं बदला: Complex bugs automatically fix नहीं होते। Architecture decisions अभी भी खुद लेनी पड़ती हैं। Production-critical logic हमेशा manually review होती है।
Frequently Asked Questions
Q1: What are some of Google’s AI tools?
Google के कुछ popular AI tools हैं जैसे Gemini Code Assist, Google AI Studio, NotebookLM, Gemini CLI, Google Stitch और Jules। ये tools coding, UI design, documentation समझने और automation जैसे कामों में मदद करते हैं।
Q2: Which is the best AI tool for developers?
अगर एक best चुनना हो, तो Gemini Code Assist developers के लिए सबसे useful है क्योंकि यह सीधे IDE में code suggestions, debugging और unit tests में मदद करता है। हालांकि, अलग-अलग काम के लिए अलग tools बेहतर हो सकते हैं।
Q3: Jules और Gemini Code Assist में fundamental फर्क क्या है?
Gemini Code Assist IDE में real-time suggestions देता है जब आप actively code लिख रहे होते हो। Jules asynchronous है, आप task assign करो और चले जाओ, GitHub पर PR ready मिलती है। दोनों अलग-अलग scenarios के लिए हैं और दोनों साथ में use हो सकते हैं।
Q4: Google Stitch free plan में serious work होता है?
350 standard generations per month मिलती हैं। Casual use और छोटे projects के लिए यह काफी है। अगर daily heavy design work है तो limit जल्दी खत्म होगी।
Q5: Gemini CLI और Jules में क्या फर्क है?
Gemini CLI interactive है, real-time terminal queries के लिए। Jules less interactive है, task approve करने के बाद independently काम करता है। Gemini CLI quick questions के लिए है, Jules longer autonomous tasks के लिए।
Google ने 2025-26 में developers के लिए एक genuinely useful ecosystem तैयार किया है। Gemini Code Assist का free होना, Jules का async model, Stitch का text-to-UI workflow, और AI Studio की API testing capability, यह सब मिलकर एक solid toolkit बनाते हैं।
लेकिन एक बात याद रखो। यह tools आपकी thinking replace नहीं करते। Boilerplate faster होगी, documentation जल्दी समझ आएगी, boring tasks delegate होंगी, UI का starting point मिलेगा। असली problem-solving, architecture, और code quality की ज़िम्मेदारी अभी भी आपकी है।
आपकी बारी: इनमें से अपने कोई tool try किया है? अगर आपने कोई भी tool try किया है तो नीचे comment में जरूर बताओ।
Disclaimer: इस article में दी गई जानकारी April 2026 तक के personal experience और research पर based है। Google के tools की pricing और features कभी भी बदल सकते हैं, इसलिए किसी भी paid plan लेने से पहले official website पर ज़रूर check करें। इस article में कोई sponsored content या paid partnership नहीं है। AI tools का output हमेशा खुद review करें, blindly production में मत लगाएं।
1 thought on “7 Google AI Tools for Developers (2026): मेरा Real Workflow और Best Tools”